|
|
First time? See the Getting Started guide first! |
Expense Reports are a grouping of single expenses that you submit to your company for reimbursement.
To create a new Expense Report, select New Expense Report from the expense list. To edit an existing expense report (until it has been approved), click on the name from the expense list.
The initial information needed for an expense report is the name, and date range. This can be anything you want - a business trip (hotel, airfare, etc), a month of expenses - any system your company uses for expense reports. You can create as many expense reports as you need and each expense report can contain as many expense details as you need.

When you have created the expense report (or clicked on a name to edit an existing report), you are shown the expense editing screen. This is where you can add or edit the expense details.
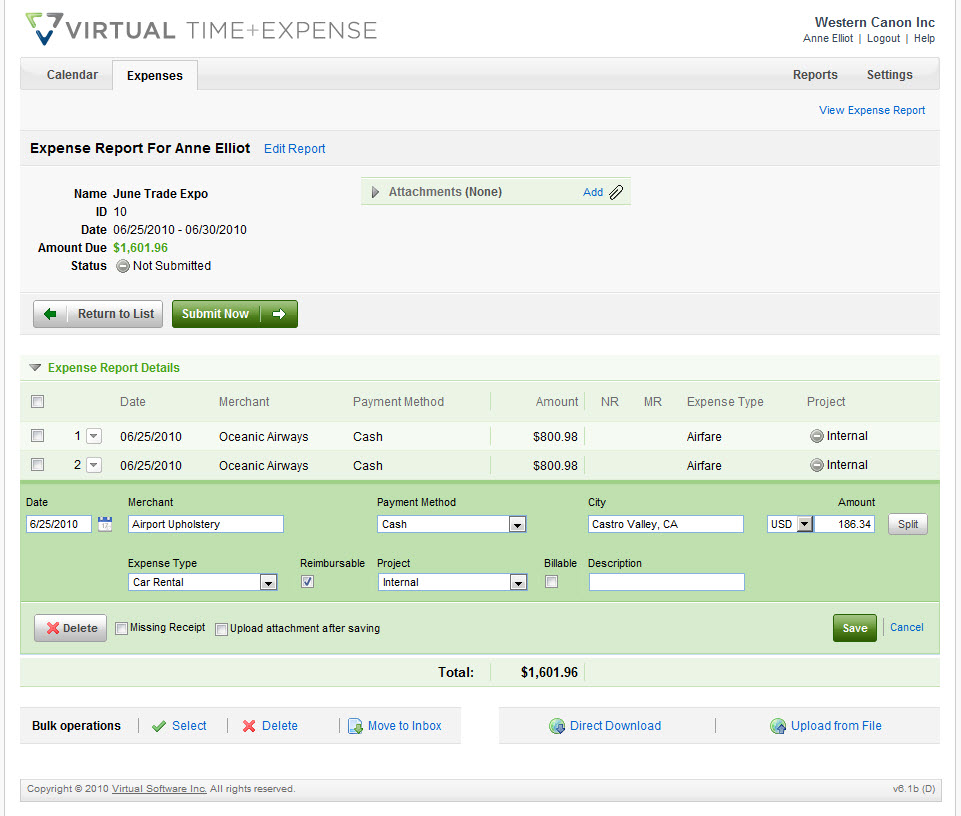
To create a new expense detail, click "New Detail". For a new expense report, this is done for you. An expense detail has the following fields:
- Date: this is when the expense occurred.
- Merchant: this is where the expense occurred.
- Payment Method: this is what you used to pay for the expense. What is really important here is if its a personal method (reimbursable) or company paid like a company credit card (not reimbursable).
- City: the location of the expense.
- Amount or Quantity: the amount of money you spent. Depending on the expense type, either the amount will be enables or the quantity.
- Reimbursable: if checked, you are asking to be reimbursed by your company for this expense. This is not possible for company paid methods like company credit cards.
- Project and Billable: this is to allow your company to track expenses to a project, and to possibly charge the expense to another company.
- Description: these fields are notes for you and also for your company to understand the expense so you can be reimbursed.
- Missing Receipt: normally you would submit copies of the expenses along with this expense report. This field specifies that you do not have the original receipt, and it will be up to your company if it is accepted.
- Upload Attachment After Saving (If attachment feature enabled): after you've saved your information, an attachment box will appear.
The lower section of the expense editing screen is the expense detail list. This is a summary list of all the details contained in this report. Click on the icon in the leftmost column to edit that detail, or click on the delete
When you are finished adding and editing the expense details for this report, you then need to submit it for approval and reimbursement. Do this by clicking on the Submit Now link. The status for this report in the expense list will change from unsubmitted to pending approval. You can continue to make changed to the expense report until it has been approved.
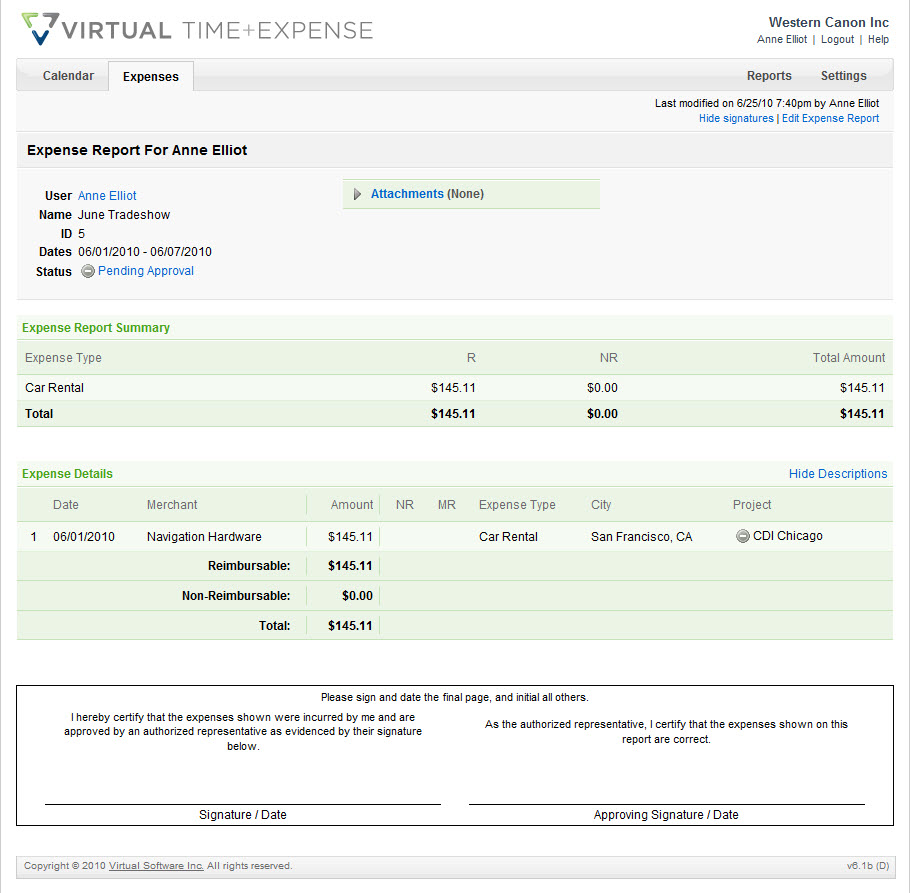
If you click on Printable Version at the top right of the screen, it shows you the expense view. The expense view is similar to the expense edit screen, but adds expense type summaries and signature lines (if needed). If you need to print something to attach physical receipts, this is what you would use.